4.9-Star Rated
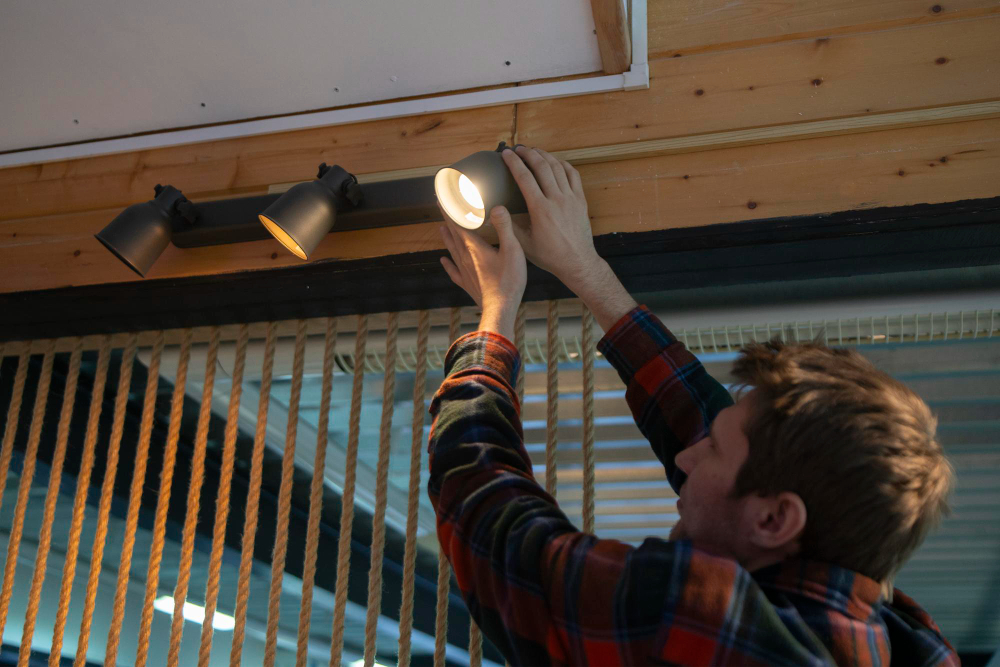
When your outdoor lights stop working, the problem is usually one of a few common issues you can check yourself before calling for help. Most outdoor lights not working troubleshooting comes down to tripped circuits, moisture damage, faulty sensors, or problems with the wiring rather than just a bad bulb. Understanding what causes these issues will save you time and money.
You might think a dead outdoor light just needs a new bulb. But the real problem often hides in places you wouldn't expect, like a tripped breaker, a faulty light switch, or water that got into the fixture during bad weather.
Ithaca's freeze-thaw cycles, heavy rain, and winter ice are hard on outdoor electrical components, and homes across Ithaca and Tompkins County deal with these conditions for much of the year. This guide walks you through each common cause of outdoor lighting failure so you know what to check yourself and when you need a licensed electrician.
In this article, you will learn about:
Keep reading to work through each possible cause in order, from the simplest fix to the issues that need professional attention.
When outdoor lights go dark without warning, the cause is usually related to power supply issues, protective devices, or control system failures rather than the lights themselves. Most problems can be fixed without replacing any fixtures.
Your circuit breaker controls power to all outdoor lighting on that circuit. A tripped breaker cuts electricity to multiple lights at once, which is why several fixtures might stop working together.
Find your electrical panel and look for any breaker switches in the middle position or fully off. The outdoor lighting circuit is often labeled, but you may need to identify it by checking which breaker controls your exterior outlets and lights.
Reset a tripped breaker by pushing it fully to the off position first, then back to on. If the breaker trips again immediately, you likely have a short circuit or overloaded circuit that needs professional attention. Don't keep resetting a breaker that trips repeatedly.
Test your outdoor light fixture after resetting the breaker. If power is restored, the problem is solved. If lights still don't work, move on to checking other protective devices in the system.
GFCI outlets protect outdoor circuits from electrical hazards. When a GFCI trips, it cuts power to everything connected downstream, which can affect multiple outdoor light fixtures even if they seem unrelated.
Look for GFCI outlets near your outdoor lights, in the garage, or inside near exterior walls. These outlets have test and reset buttons in the center. A tripped outdoor GFCI outlet will have a reset button that pops out.
Press the reset button firmly until it clicks into place. You should hear a snap when it engages properly. If the button won't stay in or trips again right away, the GFCI itself may be faulty or there's a ground fault in your wiring.
Some outdoor lighting systems have GFCI protection built into the transformer or control box rather than at an outlet. Check these locations if you can't find a tripped GFCI outlet. According to the Electrical Safety Foundation International, GFCIs have saved thousands of lives since the 1970s and have helped cut the number of home electrocutions in half, which is why building codes require them on all outdoor circuits.
Heavy rain, lightning, and power surges damage timers and photo sensors more often than the lights themselves. These control devices are sensitive to electrical fluctuations and moisture infiltration.
Check your timer settings first. Power outages reset some timers to factory defaults, which means your programmed schedule disappears. Open the timer and verify the current time matches actual time. Reprogram your on and off times if needed.
Photo sensors can fail when water gets inside the housing or when lightning causes internal damage. Test a photo sensor by covering it completely with your hand during daytime. The lights should turn on within 30 seconds if the sensor works properly.
Replace failed timers or sensors rather than trying to repair them. These components are inexpensive compared to troubleshooting electrical problems or replacing entire light fixtures unnecessarily.
Rain and freezing temperatures create conditions that cause electrical connections to fail, water to seep into fixtures, and wiring problems to develop. These weather-related issues are some of the most common reasons outdoor lights stop working, and they affect homes from Trumansburg and Cortland to Watkins Glen and everywhere in between.
Water that gets inside light fixtures creates electrical shorts and corrodes internal components. When moisture enters through cracked seals or damaged gaskets, it builds up around wire connections and causes them to fail. You might not see the water damage from the outside, but it damages the wiring where power enters the fixture.
The electrical connections inside your fixtures are especially vulnerable to moisture. Water causes corrosion on wire terminals and connection points, which blocks the flow of electricity. This corrosion looks like a white or green powder on metal parts.
Your fixtures need proper seals to keep water out. Over time, rubber gaskets and silicone seals break down from sun exposure and temperature changes. When these seals fail, rain enters the fixture during storms and stays trapped inside.
Cold temperatures cause metal components to contract and expand, which loosens wire connections over time. The repeated freeze-thaw cycles push connections apart at junction boxes, transformers, and fixture terminals. These loose connections create intermittent power problems or complete failures.
Ice formation inside junction boxes damages wire nuts and push connectors. When water freezes, it expands and forces connections apart. The same ice can crack plastic components in your lighting system.
Snow and ice buildup also pulls on fixtures and wire runs. The extra weight strains mounting brackets and can yank wires loose from their connection points. Ground stakes in landscape lighting systems often shift or heave out of frozen soil.
Heavy rainfall overwhelms even properly sealed fixtures when drainage holes get clogged. Water pools inside the fixture instead of draining out, which leads to immediate electrical shorts. Your lights might work fine until a major storm hits, then suddenly fail.
Transformers for low-voltage landscape lighting shut down when they detect moisture. Many models have built-in safety features that cut power when water enters the transformer housing. This protects the system but means your lights stopped working after rain until the transformer dries out.
Ground-fault circuit interrupters trip during wet weather to prevent electrical hazards. If your outdoor lights are on a GFCI circuit, heavy rain can cause the breaker to shut off power to all connected fixtures. You need to reset the GFCI and identify which fixture is causing the problem.
Swapping out a dead bulb seems like the obvious first step when outdoor lights stop working. But if new bulbs don't solve the issue, you're likely dealing with electrical problems in the fixture, wiring, or power supply.
LED bulbs don't burn out like old incandescent bulbs. They gradually dim over time or stop working suddenly due to internal component failure. This means you can't always tell if an LED bulb is bad just by looking at it.
When an LED bulb fails, the problem often lies in its driver circuit rather than the light source itself. The driver can overheat or fail from power surges, leaving the bulb completely dead without any visible damage. You need to test the bulb in another fixture or try a known working bulb in the problem fixture to diagnose the real issue.
Temperature extremes affect LED performance too. Cold weather can make LEDs appear dimmer or fail to turn on until they warm up. Heat buildup in enclosed fixtures shortens LED lifespan dramatically. According to the U.S. Department of Energy, LED bulbs use at least 75 percent less energy than traditional incandescent bulbs and last up to 25 times longer, but they still need proper fixtures and ventilation to reach their full lifespan outdoors.
If you see black marks, melted plastic, or discoloration around the bulb socket, you have a wiring problem that a new bulb won't fix. These burn marks indicate excessive heat from loose connections, corroded wires, or circuits drawing too much current.
Porch light wiring problems create dangerous conditions that need immediate attention. Loose wire connections create electrical resistance, which generates heat. This heat can melt insulation, damage the fixture, and create fire hazards.
Check these common wiring issues:
Never ignore burn marks. Turn off the power at the breaker and inspect all connections inside the fixture. Replace damaged wiring or call an electrician if you find extensive damage.
Budget bulbs often lack proper weatherproofing and fail quickly in outdoor conditions. They can't handle moisture, temperature swings, and UV exposure like quality outdoor-rated bulbs can.
Low-cost bulbs may have inferior seals that let moisture inside. This moisture corrodes internal components and causes premature failure. The problem repeats each time you install another cheap replacement.
Outdoor-rated bulbs include specific features that matter:
Spending more on proper outdoor bulbs saves money long-term. A quality bulb lasts years in harsh conditions, while cheap alternatives might fail within months.
Sometimes the bulbs and fixtures work fine, but the switch controlling them has failed. Switches wear out from repeated use, and the wiring connections behind them can loosen over time.
Light switches have moving parts that wear down after years of use. The metal contacts inside the switch can corrode or break, which stops electricity from flowing to your outdoor lights. Most switches last 15 to 20 years before they need replacement.
You can test if your switch is bad by turning it on and off several times. If the lights flicker or only work sometimes, the switch is likely worn out. A loose or wobbly switch plate is another sign of a failing switch.
Signs your switch needs replacement:
Smart switches need proper setup and a strong Wi-Fi connection to work correctly. If your outdoor lights stopped working after you installed a smart switch, the problem might be with the switch itself rather than the lights.
Many smart switches require a neutral wire to function, which older homes might not have. Without this wire, the switch won't power on at all. Some smart switches also need specific types of bulbs to work properly, especially dimmable LED models.
Check if the switch lost its connection to your home network. Reset the switch according to the manufacturer's instructions and reconnect it to your Wi-Fi. Make sure the switch firmware is updated through its app.
The wires connecting to your light switch can work loose over time, especially in homes built before 1990. Temperature changes make the metal wires expand and contract, which gradually loosens the screw terminals holding them in place.
Turn off the circuit breaker before checking any wiring. Remove the switch plate and pull the switch out carefully. Look at the wire connections on the sides of the switch. If any wires look loose or disconnected, that's your problem.
Tighten any loose screws holding the wires. If a wire has pulled completely free, you'll need to strip a small amount of insulation and reconnect it properly. Black wires connect to the brass screws, white wires to silver screws, and green or bare copper wires to the green screw. If you're not confident working with wiring, call a licensed electrician rather than risking an improper connection.
When multiple landscape lights stop working at once, the cause is usually upstream in your system. A single point of failure, like a transformer or damaged wire, can knock out several fixtures or an entire zone at the same time.
The transformer converts your home's 120-volt power to the 12-volt current that runs most landscape lighting. If your transformer fails, none of the lights connected to it will turn on.
Check if the transformer is plugged in and whether the outlet has power. Test the outlet with another device or use a voltage tester to confirm it's working. Look at the transformer itself for a reset button or blown fuse, as many models have built-in protection that trips when the system draws too much power.
If the transformer powers on but lights still don't work, test the output terminals with a multimeter. You should see around 12 volts. No voltage at the output means the transformer needs replacement.
Transformers can fail from age, moisture damage, or overloading. Make sure your total wattage doesn't exceed 80 percent of the transformer's capacity.
Underground wiring connects your transformer to each light fixture. These wires face constant stress from soil shifts, digging, lawn equipment, and water exposure.
A single cut or corroded wire can disable every light downstream from the damage point. This explains why you might see one section of your yard go dark while others stay lit.
Walk your property and look for signs of recent digging, landscaping work, or areas where roots might have pushed through. Check wire connections at each fixture, as corrosion builds up at junction points and creates resistance or breaks the circuit completely.
Use a multimeter to test voltage at each fixture moving away from the transformer. When voltage suddenly drops to zero, the damage is likely between that fixture and the previous one. You'll need to dig up and repair or replace the damaged wire section.
When all your lights work but appear noticeably dim, you're dealing with voltage drop. This happens when electrical resistance builds up along the wire run, reducing power by the time it reaches your fixtures.
Voltage drop increases with distance from the transformer. Lights at the end of a long wire run naturally receive less power than those closer to the source. Using wire that's too thin for the distance makes this worse.
Check connections at your transformer terminals, as loose connections create resistance. Measure voltage at fixtures using a multimeter. You should see 10.8 to 12 volts at each light. Readings below 10.5 volts will cause dim output.
Fix voltage drop by shortening wire runs, using thicker gauge wire, or splitting your system into multiple zones. You can also reduce the total wattage on each run.
Some outdoor lighting issues point to dangerous electrical problems that require professional help. Fixing these problems yourself can lead to serious injury or fire hazards.
Flickering outdoor lights often mean you have loose or damaged wiring behind the fixture. The electrical connection breaks and reconnects rapidly, which creates heat at the connection point. This heat can melt wire insulation and start fires inside your walls or junction boxes.
You might see flickering after storms or when temperatures change. Water can seep into outdoor electrical boxes and corrode the wire connections. Corroded wires create resistance that leads to heat buildup and potential fire risks. According to the U.S. Fire Administration, electrical arcing accounted for 74 percent of residential electrical fires involving distribution and lighting equipment, and many of these fires start at exactly the kind of loose, corroded connections that outdoor fixtures develop over time.
Do not try to fix wiring yourself if you lack electrical training. An electrician can safely identify whether you need new wiring, better weatherproof boxes, or fixture replacement. They have the tools to test voltage and find problems you cannot see.
Outdoor lights exposed to rain and moisture can develop serious safety problems. Water that enters light fixtures or electrical boxes creates paths for electricity to flow where it should not. You can get shocked just by touching a wet light fixture or switch.
Moisture problems get worse over time. Small cracks in fixtures let water in gradually until connections corrode completely. Call an electrician immediately if you notice:
An electrician will install proper weatherproof boxes and GFCI protection. GFCI outlets shut off power within milliseconds when they detect moisture, which prevents deadly shocks. If your outdoor circuits aren't already on GFCI protection, that upgrade alone is one of the most important electrical repairs you can make.
Your circuit breaker trips to protect you from electrical fires and overloads. If your outdoor lighting breaker trips more than once, something is wrong with the circuit. According to the U.S. Fire Administration, residential electrical malfunction fires caused an estimated 23,700 fires and 305 deaths in 2023, and repeated breaker trips are one of the clearest early warning signs.
Common causes include damaged underground wiring, too many lights on one circuit, or short circuits inside fixtures. Each time the breaker trips, your wiring experiences stress that degrades its protective insulation. This damage gets worse with each trip.
An electrician can measure the actual load on your circuit and find hidden shorts. They may need to install a dedicated circuit for your outdoor lights or replace damaged wiring. Never replace a breaker with a higher amp rating to stop trips, as this removes the protection that prevents house fires.
Most outdoor lighting problems start with something simple, a tripped breaker, a tripped GFCI, a failed timer, or a bulb that reached the end of its life. These are worth checking first because they take minutes to fix and don't require any tools beyond a flashlight and a steady hand.
When the simple fixes don't work, the issue usually involves moisture, corroded connections, damaged wiring, or a failed transformer. Ithaca's weather puts constant stress on outdoor electrical components, and the older the fixture or wiring, the more vulnerable it becomes. Burn marks, sparking, flickering, warm switches, and breakers that trip more than once are all signs that the problem has moved past what a bulb swap or GFCI reset can solve.
If you've worked through the troubleshooting steps in this guide and your outdoor lights still aren't working, or if you've found any of the warning signs that point to wiring damage, don't try to push further on your own.
Contact Pleasant Valley Electric to have a licensed electrician diagnose the problem safely. The team has been handling residential electrical work across Ithaca and Tompkins County since 1983, and they can get your outdoor lights back on the right way.
Whether you are dealing with flickering lights, outdated wiring, breaker problems, or planning a larger electrical upgrade, Pleasant Valley Electric is here to help. Our licensed electricians provide dependable service, honest recommendations, and fast response times throughout Ithaca and surrounding communities.
We call you back within 30 minutes during business hours.